Android NDK 开发流程
[TOC]
一、下载并配置NDK
下载地址:https://developer.android.google.cn/ndk/downloads/
下载成功,直接解压配置自己的NDK路径,注意中间不要有空格,否则后面开发中会出问题。
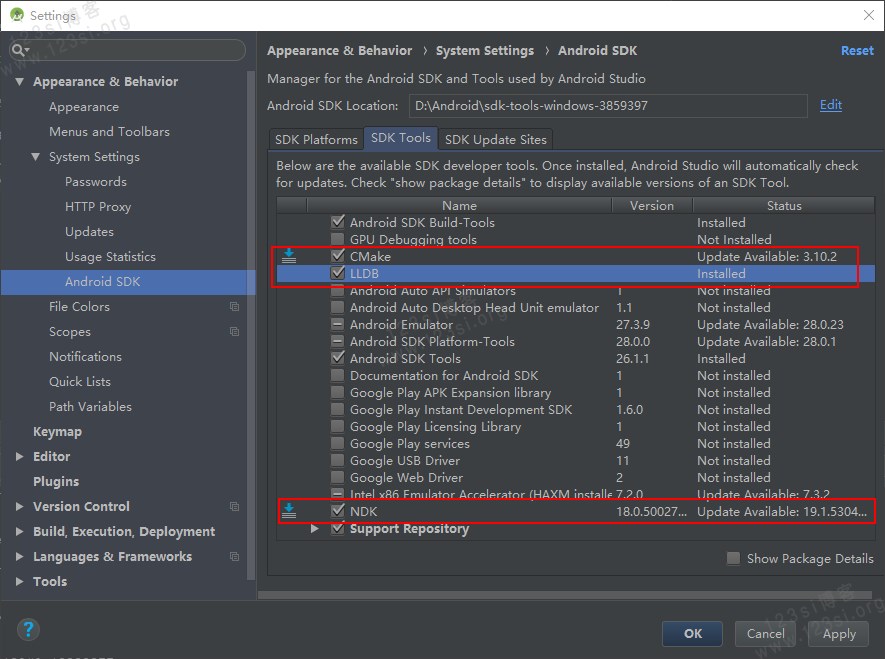
二、创建 Android 项目,进行NDK配置
1、配置好NDK路径之后记得在工程目录的local.properties文件中进行关联,注意要配置自己NDK的路径
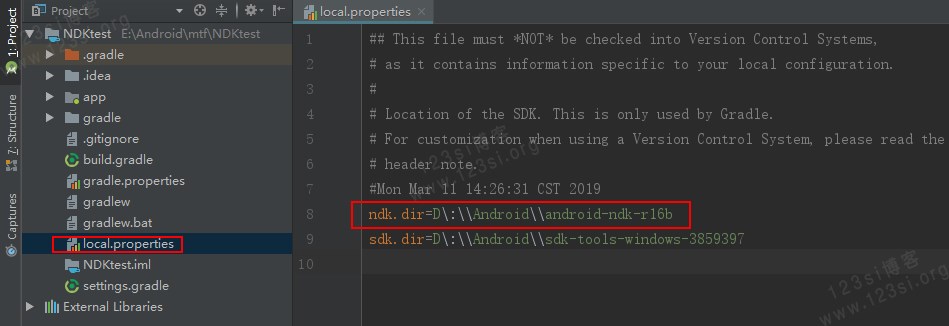
2、如果建立的是普通的 Android 项目,可按照文章内容进行配置,如果直接建立C/C++项目,下面的配置可以直接忽略的,因为系统自动配置好了。
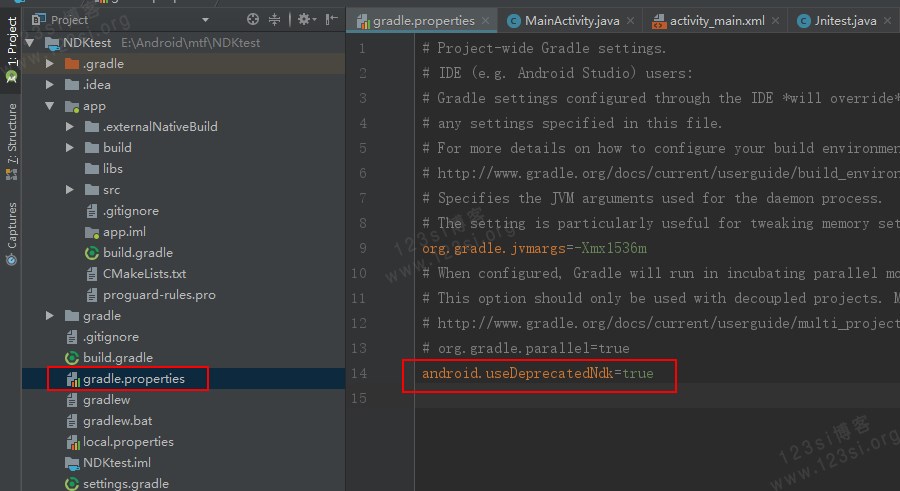
三、在 Android 项目中声明 native 方法
public class Jnitest {// 声明所需的 native 方法static {System.loadLibrary("Jnitest");}public native String getString();public native void setString(String str);}
四、编译 native 方法生成 .h 头文件
1、点击 Build –> Make Project,生成 class 文件
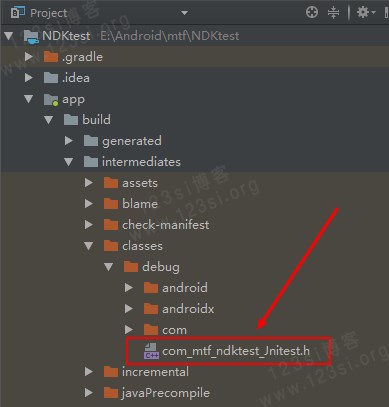
2、找到class文件,在app->build->intermediates->classes->debug目录下:
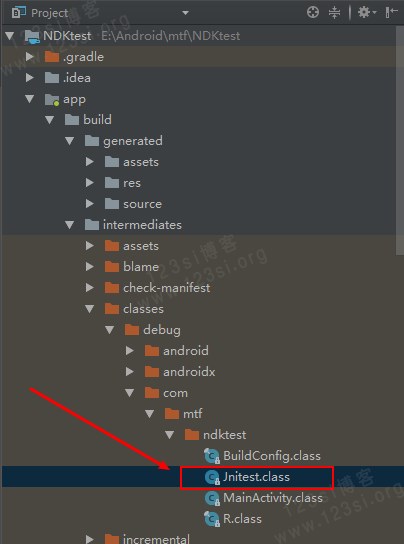
3、通过javah命令生成.h头文件,点击 Android Studio 底下菜单中的 Terminal ,一次输入:
cd app\build\intermediates\classes\debug
// 这里注意改成自己的包名javah -jni com.mtf.ndktest.Jnitest
入下图所示,您的 .h 头文件已经生成成功,默认位置在 debug 目录下

/* DO NOT EDIT THIS FILE - it is machine generated */#include <jni.h>/* Header for class com_mtf_ndktest_Jnitest */#ifndef _Included_com_mtf_ndktest_Jnitest#define _Included_com_mtf_ndktest_Jnitest#ifdef __cplusplusextern "C" {#endif/** Class: com_mtf_ndktest_Jnitest* Method: getString* Signature: ()Ljava/lang/String;*/JNIEXPORT jstring JNICALL Java_com_mtf_ndktest_Jnitest_getString(JNIEnv *, jobject);/** Class: com_mtf_ndktest_Jnitest* Method: setString* Signature: (Ljava/lang/String;)V*/JNIEXPORT void JNICALL Java_com_mtf_ndktest_Jnitest_setString(JNIEnv *, jobject, jstring);#ifdef __cplusplus}#endif#endif
五、创建 C/C++ 文件实现 .h 文件
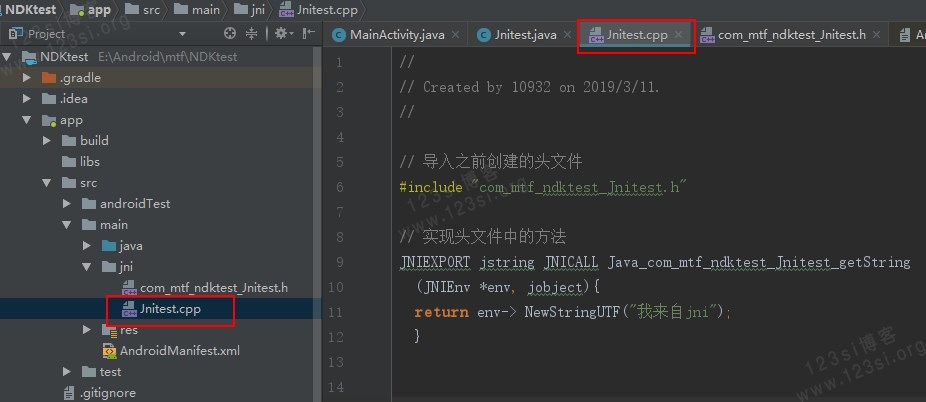
创建jni目录,将刚才生成的.h文件复制过来,创建.c/.cpp文件,实现.h文件中的方法,方法名称可以直接从.h文件中复制过来。
六、编译生成 .so 文件
1、用cmake方式编译so库,创建CMakeLists.txt文件。
# For more information about using CMake with Android Studio, read the# documentation: https://d.android.com/studio/projects/add-native-code.html# Sets the minimum version of CMake required to build the native library.cmake_minimum_required(VERSION 3.4.1)# Creates and names a library, sets it as either STATIC# or SHARED, and provides the relative paths to its source code.# You can define multiple libraries, and CMake builds them for you.# Gradle automatically packages shared libraries with your APK.add_library( # Sets the name of the library.Jnitest# Sets the library as a shared library.SHARED# Provides a relative path to your source file(s).src/main/jni/Jnitest.cpp )# Searches for a specified prebuilt library and stores the path as a# variable. Because CMake includes system libraries in the search path by# default, you only need to specify the name of the public NDK library# you want to add. CMake verifies that the library exists before# completing its build.find_library( # Sets the name of the path variable.log-lib# Specifies the name of the NDK library that# you want CMake to locate.log )# Specifies libraries CMake should link to your target library. You# can link multiple libraries, such as libraries you define in this# build script, prebuilt third-party libraries, or system libraries.target_link_libraries( # Specifies the target library.Jnitest# Links the target library to the log library# included in the NDK.${log-lib} )
2、配置app module目录下的build.gradle文件
android {......defaultConfig {......externalNativeBuild {cmake {cppFlags ""abiFilters "armeabi", "armeabi-v7a", "x86" //输出指定cpu体系结构下的so库。}}}externalNativeBuild {cmake {path "CMakeLists.txt"}}......}
3、编译并看一下结果
public class MainActivity extends AppCompatActivity {@Overrideprotected void onCreate(Bundle savedInstanceState) {super.onCreate(savedInstanceState);setContentView(R.layout.activity_main);TextView tv = (TextView) findViewById(R.id.tv_test);tv.setText(Jnitest.getString());}}

(完)